
If you have sad old grungy cabinets like I did and can’t afford to replace them, you might try painting them for a fresh new look. It seems like a Herculean task but it’s really not that bad. It only took me about 15 months to complete mine. A normal person could do it in a few weeks. Of course, I did everything backwards and wrong so that’s why I’m writing this post.
The best way to start is to set up a long work surface on which to place your cabinet doors. Choose a dust-free place to paint. Label the backs of the doors with numbers on masking tape in order to replace the doors where they came from. Take off the doors and remove all the hardware. Paint the doors and the frames, seal with a top coat, let dry, and rehang the doors. Sounds easy, doesn’t it?

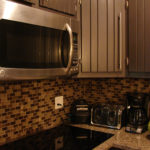
Painted Cabinets, Before and After
As you can see in the photo above, I didn’t just paint my cabinets. No, I pretty much changed every surface in my kitchen. I’ll tell you about that in another post. For now, we’ll just talk about painting the cabinets.
The Materials List
Here are the main items I used. Of course, you also need gloves, rags, stirring sticks, drop cloths, sandpaper, tools, etc.
Paint
I used General Finishes milk paint. This stuff is great on wood cabinets and furniture. Minimal sanding is needed. No primer is necessary as the paint is self-sealing. However, if you have a wood that is known to bleed, such as pine or mahogany, you should apply a stain blocker first.

General Finishes Dark Chocolate Combined with Queenstown Gray Milk Paint
Two quarts were enough to cover my cabinets. You’ll also need a clear top coat to protect your paint. I used the General Finishes satin top coat which was water-based and very easy to use and clean up.
Brushes
Use any paintbrush that is comfortable for you to apply the paint. I chose an angled, long-handled 2″ all-purpose brush. For the final top coat, however, you absolutely must use foam brushes to get a smooth, stroke-free finish.

foam brushes
You might also need a ladder to reach the higher cabinets and probably a bunch of other materials and tools I’ve forgotten to mention. Don’t worry, you’ll figure it out.
The Process
The first thing to do is choose your paint color. How do you choose? I have no idea! I had to buy four different colors before I finally mixed my own custom color. Try buying some small sample bottles and slap some on your cabinets. Observe the swatches for a few weeks: how do the colors look in different light? Bright morning light, harsh night time fluorescent bulbs, and soft daytime light on a stormy day have different effects on paint color.
Here are my first two swatches:

These are General Finishes Milk Paint in Seagull Gray at left and Driftwood Gray at right. I knew right away that both these colors were too light. Next I tried Queenstown Gray.

Cabinets, Paint Sample, Queenstown Gray
This color was a little better but still too light and a bit too blue. I’m not a fan of blue and my main quarrel with grays is that some of them have significant blue undertones. What I really wanted was to pull out one of the dark colors from the tile of the backsplash. (The colors of this photo are a little off: the darkest tile is quite dark gray, not the brown it appears in this picture.)
Next I ordered a small can of the orange Persimmon. I mixed up a bit with the Queenstown Gray. It was okay but not that great. So I ordered a can of the Dark Chocolate which I combined with the Queenstown Gray in a 1:1 ratio. I put some on my cabinets and I LOVED it! I could hardly stop painting. But since I hadn’t even cleaned or sanded my cabinets yet, I had to force myself to put that brush down.

General Finishes Dark Chocolate Combined with Queenstown Gray Milk Paint
Preparing the cabinets for paint is a very important step that is painful but really cannot be skipped. I used a cleaner and deglosser to scrub my grungy 40-year-old cabinets. Don’t skip this step even if your cabinets are newer. You only have to cook bacon one time for grease to attach to your cabinets. The deglosser takes off the varnish finish and creates “tooth” so that your paint attaches strongly to the wood. Wear gloves and follow the directions on the container.

Cleaning and Deglossing the Cabinets
If you’re lucky and you’re cabinets are in good shape, you can stop here and start painting; if not, you’ll have to do some sanding. Parts of my cabinets that were over the cooktop had been steamed thoroughly, resulting in buckled, rough patches of wood. I took the time to sand down these areas. Fill any holes or gouges with wood putty and sand flat.
Now it’s time to paint! I used a regular paintbrush and gave each cabinet about three coats. You could probably stop at 2 but mine were in bad shape and old and thirsty and sucked up that paint. I did have some vertical brush strokes but they didn’t bother me. If you don’t want brush strokes use a foam brush to apply the paint.
Let your paint layers dry for the amount of time specified on the package before applying a protective top coat. Use a foam brush and apply at least 3 coats of varnish. This step really is necessary to protect your paint as cabinets get a lot of use and handling. I used a satin finish because I did not want a lot of gleam.
The General Finishes top coat I used dried very quickly. Still, I let the cabinets dry for a few days before I hung up the cabinet doors. I purchased new hardware but you can reuse yours and if it’s ugly you can spray paint it to give it an update.
Tips for Success
- Clean and Degrease. Don’t skip this step! If your cabinets are super greasy, clean with soap and water before using a deglosser.
- Label the hinges and doors. Labeling your hinges and doors will allow you to replace everything in its original spot. Think that all doors and hardware are the same and keeping track doesn’t matter? WRONG! I made this mistake with my first cabinets; I did not label them. Instead, I just stuck them back on randomly. Guess what? The hinges and doors become worn in places over the years and don’t go back in place correctly.
- Sand well, especially those nooks and crannies. I once skipped over sanding the inner legs of a dining room table and now every time I sit there my pants brush and catch against the rough wood. Oops.
- Use a primer, tint if painting a dark color. This will save you time and money. I once tried to paint over a white primed door with red paint. After 4 coats of paint I gave up and decided I had to live with the streaky, uneven look.
- Use the right paint. The first two times I tried painting cabinets, I used latex wall paint. This did not result in the best results. It looked okay, but spending a little bit more for specialty paint would have been better.
- Use a top coat sealer. Protect your hard work with a sealer! It will help prevent dings and scratches from ruining your beautiful finish. And it will be easier to clean.
And that’s a wrap! I hope your cabinet painting project goes smoothly and you have great success!
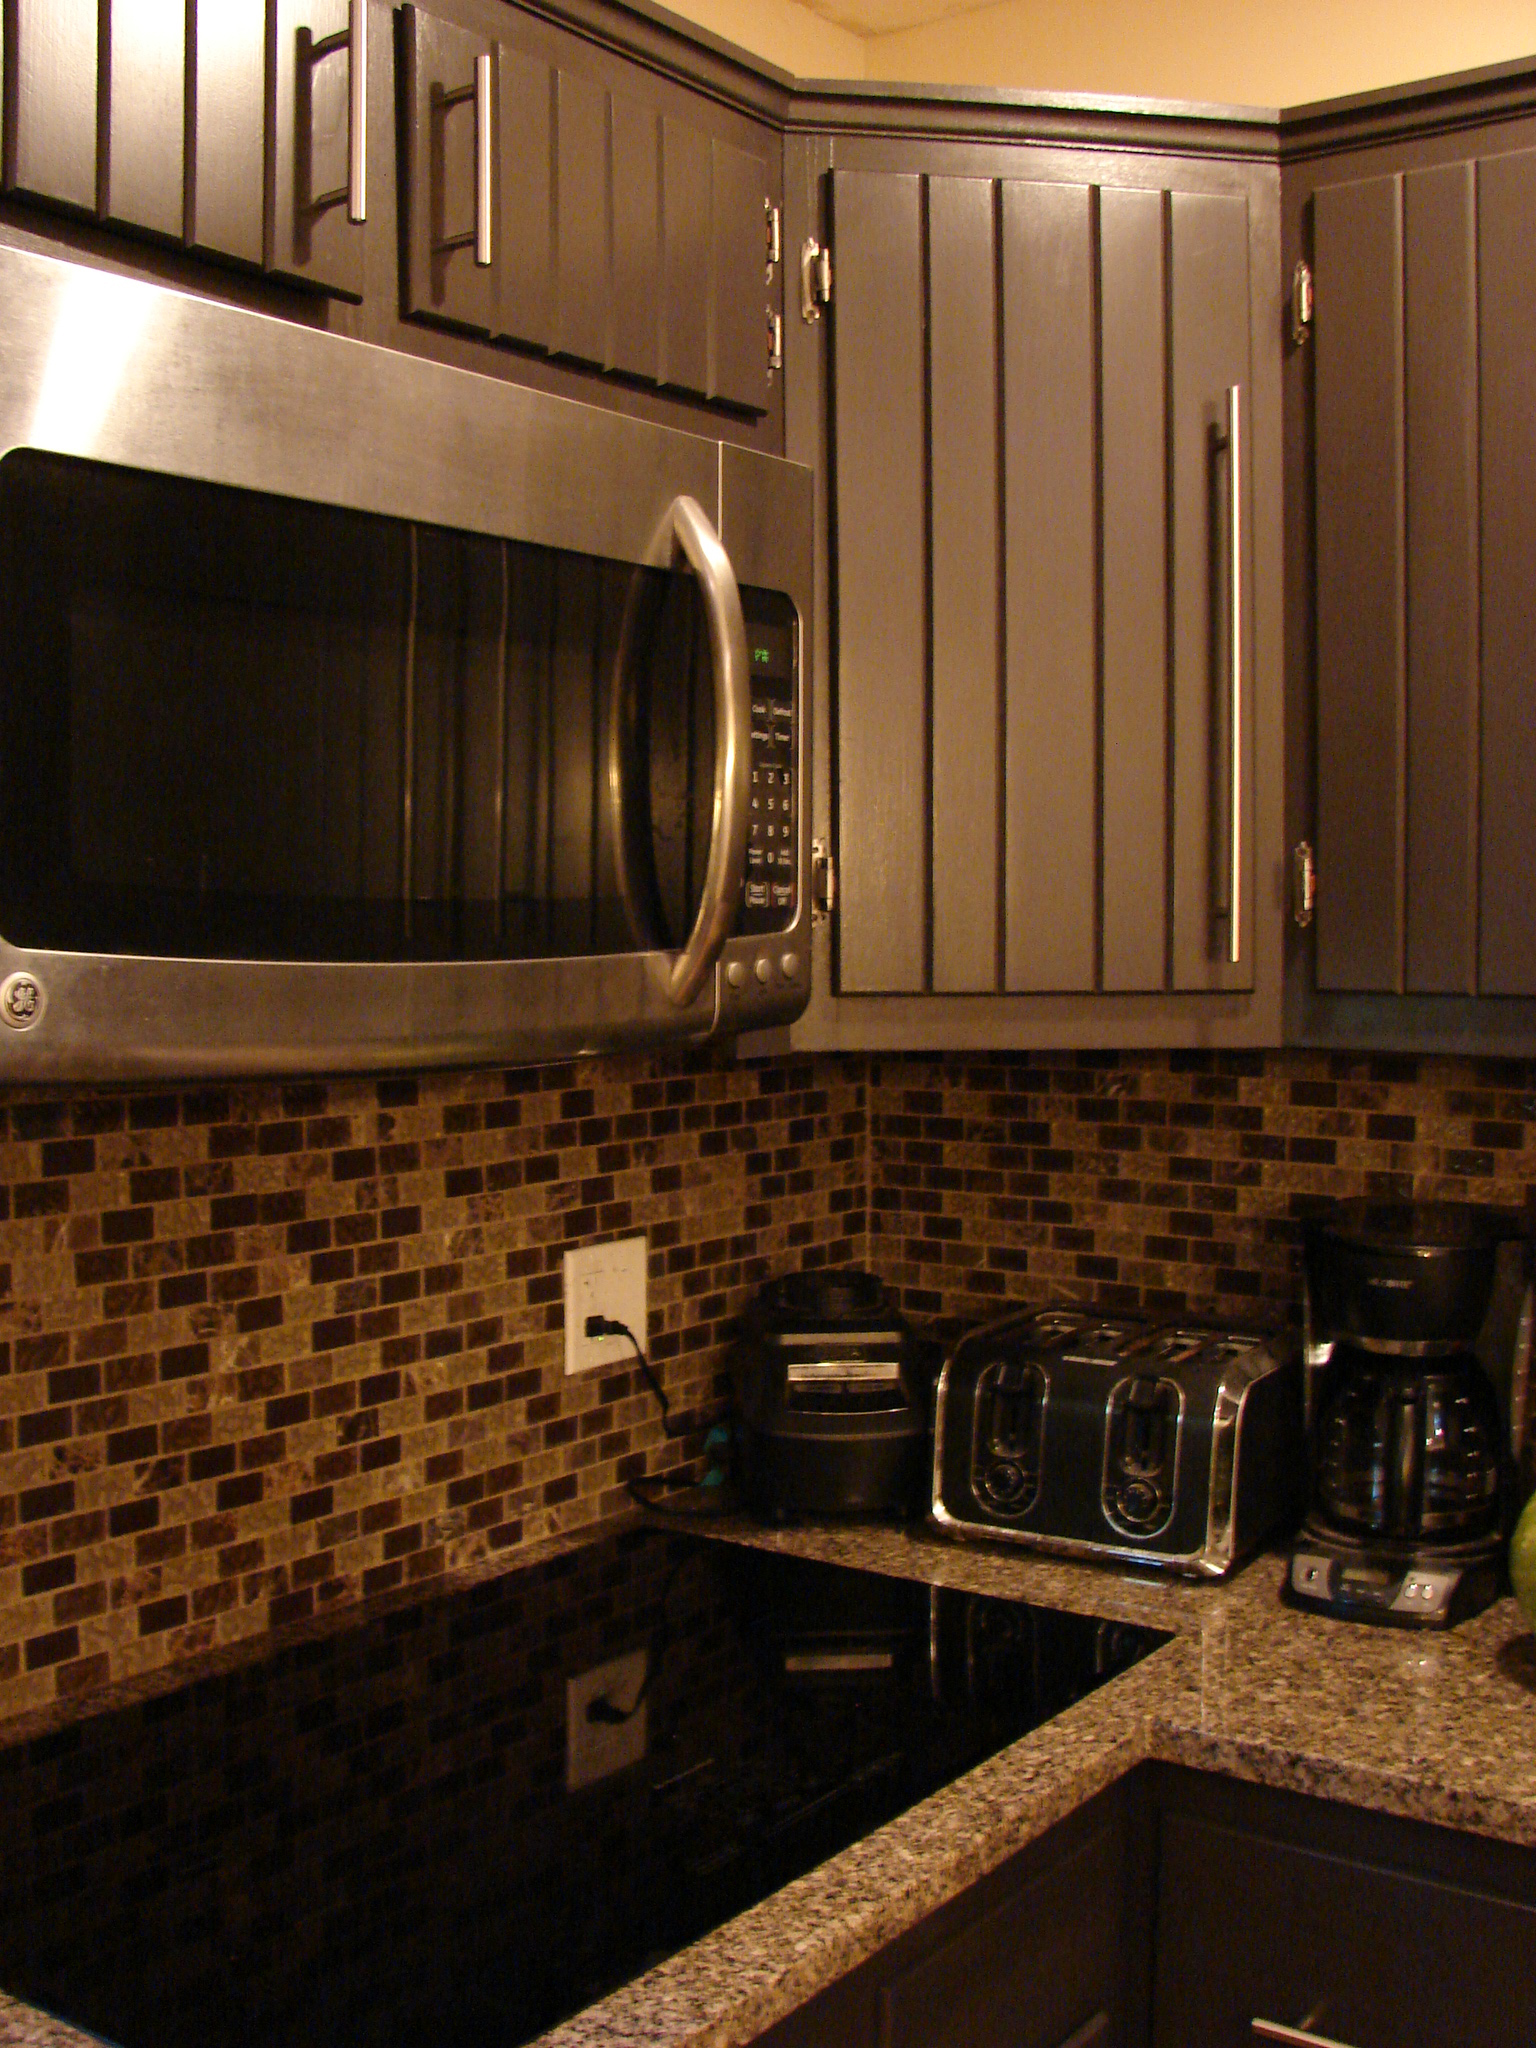
Completed Cabinets
Trackback 1
TrackBack URL
https://www.karenfurst.com/blog/how-to-paint-your-kitchen-cabinets/trackback/